Wednesday, December 17, 2014

Stuart Godwin visit

Post 44

Happiness level: 7

Can say I'm kinda happy with the progress I had in just two weeks of nonstop hardcore progress.

That's me and my band. I played a video first of the whole experience while interacting with my functional band. Only that the wifi is not on it yet.


My ball.


Looking at people enjoying my work is the best feeling EVER! #paysoffintheend


He was pretty speechless, saying my work is beyond his expectations and all that, but I think he was just being really really nice. Appreciate that.


He did stress on the importance of social media sharing which very few of our classmates did. Including myself.


Obviously with 23 years of experience in the industry, I HAD to ask him which interactive installation impacted him the most. You had to see ALOT of art installations in that time frame.

He said that what he found most amazing was like a 20ft 50ft screen (something like that, but it was big) and users get to experience a digital environment.

Size definitely does matter. If only I could get excess to a 20ft sphere ball. HMMM. (Jazmi did mention to make it huge if I could, but I don't have the cash to do it.)


The 2 week 'holiday' begins.

MERRY CHRISTMAS!!!!!!!!!

Monday, December 15, 2014

Preparing for Week 7 Guest Visit

Post 43

Happiness level:3

I've been really busy and focusing all my time on the construction of the wooband, codes and graphics. Full steam ahead!

Technical problems encountered:
- Unity can't change scenes with Serial ports. (can't call) Might have to put everything in one scene.
- SO LAGGY and the quality reduces because I had to convert all videos to OGG format.
- Only Unity pro could enable MovieTextures. (solved by using the trial mode..and uh. you know.)
- Arduino RGB colors overlapping each other (solved, but didn't get the color I want)

Motion Graphics problems encountered:
- I need plugins to achieve plexus. (It's complicated, I can't download them. And I'm cheap.)
- Had to depend A LOT on tutorials. (I thought my creative juices and spontaneity were enough, But no.)

Logistics problems encountered:
- My RM175 polystyrene ball dents easily and I don't plan on investing in another one.
- There's a line on the ball which has to covered. (It's the little opening that can't close properly when I sandwich the two halves together)

A great thank you to Yee Siang and David Tan for patiently teaching me and explaining to me the rules of Arduino and Unity.
I'm actually quite disappointed at TOA for not keeping up with the pace and installing UNITY in all the computers. They could install them for free and hire professionals! C# is dang important.

The only person who knows UNITY is Jam, and he's not even assigned to any of us. We had to call him on his personal mobile. This is ridiculous.

Can't believe I have to outsource so many talents and hardware.

Actions to do next:
TRY OUT THE WIFI MODULE!

Thursday, December 11, 2014

Sewing til the AM

Post 42

Happiness level : 6

My Motion Graphics are 80% complete, they are taking a much long time than I thought. But I did try out sewing and it turn out looking like something that came out of a thrift store.

I have never sewed in my life, so this is literally my proudest moment, my proudest milestone.

After sewing of course, with buttons and everything, I discovered I cut the fabric straight down like a box. I forgot the human arm actually widens from the wrist up. So I didn't get to close it up properly.


This fabric is from a really old shirt, I used it because it's stretchy. 


I tried to cover it up but it looks really shady.


I discovered that sewing the boards on the fabric itself would be too flimsy. So I sketched out more ideas.

The red was inspired by Baymax from Big Hero 6. I wanted the interior to be two toned as well.


Then I realised, Buzzlightyear's suit has the same mechanism I need!
The compartment which conceals the boards. My dad suggested I cut up a bottle in half and use it as the flap. (like below)


Here are some more sketches for the band.


This is the sewing of the nylon hard fabric on the sports wristguards which are a perfect fit to wrist, and my father's. A cut up bottle will be used to encase the band.


I would be thickening up with two of these hard nylon fabrics and use the top flap as the base for my boards and sew them on the top flap. The bottom flap would prevent the conductive thread from touching the skin of the users.


Of course I went to dad and mom and they gave me two sports wristbands and sewed them together to get a better, firmer, stretchable band. Sewed a hard white fabric (used for collars of formal shirts) on the top of the cute bands to cover the little heart designs and prevent stretching from the top so that it wouldn't damage my boards.


Wednesday, December 10, 2014

Motion Graphics 100% by today HAVE TO.

Post 41

Happiness level: 4

I feel like Tadashi from Big Hero 6 with all these updates.

Here's a video of me talking for a change, I might sound dead but yeah all the deadlines are piling up this week so it's safe to say my spirits aren't at an all time high.


Tuesday, December 9, 2014

Saturday, December 6, 2014

Logistics and Microphone Debugging

Post 39

Happiness levels: 8

Tutor(s) present: Jazmi, Yee Siang, Jam!

Okay first up, the logistics.


Jazmi and I discovered that there was a leak at the wall from my graphics and suggested that I should vignette it out so the hard edges would be gone and there isn't gonna look like an error.

Other than that, the outcomes were pretty good, I suspended my polystyrene ball with a piece of fishing string and clasped the two halves together with the roll of fishing string in between to hold it up from within. Discovered that if I wanted to project on two sides of the ball I needed 3m+ of space.
That would be difficult since there are going to be about 30+ projects in the same area.

Should I compromise with just one side of the ball? :(

Discovered that the ball should be slightly higher than eye level so the users won't be able to see the shadowed top of the ball. Overall logistics looks pretty good and the user would be standing behind the projector to interact with it. 

Ill disguise the table and projector into my glove compartment holder & table (which I would also hide my computers and what not under it) and wrap it around with white board so it looks super clean and white and professional looking,

So happy everything works amazing.

Microphone Debugging

Jam came to the rescue!
My microphone got fixed and apparently I was uploading unnecessary scripts which hindered it to work. I also had to fix the baud rate so it matches the baud rate of my accelerator code. Everything is moving along swiftly. 
I just have to turn the strings to numbers with Parse and put them altogether, separate the game into three parts and upload the videos separately and I'm done with the coding! I'll have to focus on the wifi module next. (oh god)

And sewing. =(

Things to do next:
- Finish up the motion graphics for the two songs
- Code up the game
- Debug Wifi


Friday, November 28, 2014

Ball and things

Post 38

Happiness level: 6

Personal progress

As for unity, David has coached me own how to create and link my scenes in UNITY. To call the scenes I would have to use 0 or 1, I think it's way better, you couldn't get the name wrong by typo.


I have also purchased my project ball. It's diameter is about 50cm, it's a bit small but it's alright since the users are going to be standing really near it and the projector wouldn't be so far. I have a limited space only. It's crazy expensive, RM175.

As of for now I have spent RM720 on materials. So expensive. But if you look at it from an agency point of view, it's actually a pretty cheap project. Many projects reach thousands of ringgit. Yeah, I'm comforting myself.


Tutor(s) present: Yee Siang

Yee Siang lent me this microphone from college which worked perfectly. The problem with my previous microphone was that it was too sensitive to sound. Excuse my badly manicured finger.


Tuesday, November 25, 2014

Stage Design & Glove Design

Post 37

Happiness level: 6

Tutor(s) present: Jazmi

Stage Design

After showing Jazmi my previous post on the motion graphics, we concluded to use different platforms instead of using just a one dimensional screen. Most of my references and tutorials are spherical as well. I proposed a few stage sketches but concluded that I could use a polystyrene sphere instead to suit my motion graphic benchmarks.

He told me that I should be careful of the shadow casts if I were to pick my polygonal stage design.

I would cut a small section in the sphere and place the DJ in it. To avoid shadow casts, I will place a small mirror to reflect the DJ into the cut out hole.

I have also concluded to suspend the sphere in mid-air.

I am considering to rent another projector so that my project could be viewed in 360 Degrees.


Glove Design

As for the glove, it is decided and preferred that it took a look of a cuff instead of a whole glove wear up to the palms.


Thursday, November 20, 2014

Placement and Wiring Test & Testing out microphone

Post 35

Happiness level: -10

Personal Progress

I tested out the placements and the wiring at home the night before the Friday consultation, and tested the microphone in the morning. While testing out the wiring with fishing string, I discovered a couple of problems. It's a lucky thing I had experience with circular boards, I would know how to deal with overlapping wiring.

I took some notes on which port would be nearer to certain parts, which would also then effect the way I code my boards.

- accelerometer change from a0 to a1 for z
- rx tx need to be taped over to avoid interferance
- RGB bulb change to pin 5 6 7 rather than 9, 10 , 11


References

Barragán, H. (2014). ElectretMicrophone \ Learning \ Wiring. [online] Wiring. Available at: http://wiring.org.co/learning/basics/electretmicrophone.html [Accessed 20 Nov. 2014].
Instructables, (2014). The microphone and breakout board. [online] Available at: http://www.instructables.com/id/Arduino-Wind-Instrument/step4/The-microphone-and-breakout-board/ [Accessed 20 Nov. 2014].

Tutorial Session

Tutor(s) present: Yee Siang

I brought my woes and my microphone and did not get to solve it.
I could have burnt my microphone.

I keep getting values even though the board wasn't hooked up to the microphone.
And when I did, Yee Siang suggested that I poke through the holes with wire instead of using alligator clips because it couldn't reach deep enough the breakout board.

It worked for awhile, but the value changes with movement. It's almost like a touch sensor rather than a microphone.

I was utterly depressed and unmotivated when I couldn't get a 'supposedly easy' mechanism to work and took 4 hours to do it. Even connecting to arduino with the accelerometer was quicker. One of the reasons why I was devastated is because I worked with sound sensors/mics twice before and had amazing results. I even singed bits of conductive thread today. Sparks. Fire. If I had burned my microphone, I burnt 8USD, just like that. With no ROI.

Why am I failing at this now? I'm determined to get it to work. In the mean time these are my current to do lists for this project.

- Make game mechanism in UNITY: Put accelerometer and changescene scripts
- Get wifi module to work
- Get microphone to work
- Sketch stage for projection mapping
- Sketch wiring in Ai
- Sketch motion graphics

It's getting down to the wire, I better get some graphics in already too.

Tuesday, November 18, 2014

First Ideation Tutorial of the Final Sem

Post 34

Happiness level: 7

Tutor(s) present: Jazmi Jamal

I was very happy with this tutorial.

Today for this session I brought my second set of music and it is wayyy better and more hyped than the first one.


I brought my boards as well to show Jazmi the placements for the boards and how it would effect the user experience. I showed him and it looked so long! Like this.


There was the LiPower and the battery to think about as well, and I wanted to sew it on the forearm, underneath my arm and the boards. Jazmi suggested that I shouldn't since the thread is going to be so thin and easily breakable.

He suggested that I stack the Xbee board and the arduino board so it looks like some kind of watch mechanism and it didn't need to fill the whole arm. A cuff would be a good design with velcro so that users could take it off and put it on easily.

He gave me a boxing glove as reference. Haha! He said to make sure to put these boards in proper casings to avoid malfunctions and interference from the environmental factors. 

I should also get on with the wooband design and the stage design as well, cause right now all I have is the really basic stuff, like how I want the band to be purple/skin colored/black and such.

Here are some references he shared with me that I could think of, to give my stage more depth and dimension.

They are all slanting walls with projectors projecting the images unto them.


It works

Post 33

Happiness Level: 6

I have made it a point to record every single detail of my working progress.

Note to self:

1. Open arduino first and link up the sketch,
then only open unity.

Why? If I open up unity first, the serial port would be already in use and I wouldn't be able to upload new sketches to my board.

2. z to a2

Wire it like this. I'm only using the Z index, so yeah I only need to hook one up.

3. blah c# script put ON THE CUBE (element)


Yes, out of frustration I named the file blah. I tried renaming it but it messes up everything. So yeah, I'm sticking with blah.


I was trying to hook up my wifi module and connect it to the computer but had some troubles. Apprently online people said the usb port has to be on com1.

I downloaded different terminals, hyperterminal, coolterm, x-ctu and XCTU. Still doesn't work. I'm starting to think it's the wiring problem.

Totally cannot be the driver problem because I already got the accelerometer to work.

BUT, after awhile I got it to work with HYPERTERMINAL and it connects! You had to pay for it.


I had to make sure the board is clean from code, I got spammed because my accelerometer code is still in it.

I have to adjust Baud rate to 38400 so I don't get alien wordings. Like this.


So after awhile I got what I wanted, but not really. It didn't say OK like it's supposed to after I typed in +++. It's to show that it's connected. Tutorials in the links below.
It was supposed to be +++OK.


Well, it's a step.


References

Faludi, R. (2013). Common XBee Mistakes. [online] Faludi. Available at: http://www.faludi.com/projects/common-xbee-mistakes/ [Accessed 18 Nov. 2014].
Hartman, K. and Faludi, R. (2012). D I Y : Superhero Communicator Cuffs. 1st ed. [ebook] New York: OCAD University. Available at: http://research.ocadu.ca/sites/research.ocadu.ca/files/socialbody/201106_SuperHeroCommunicatorCuffs.pdf [Accessed 18 Nov. 2014].
Ladyada, (2012). Xbee Adapter - Connecting, Configuring and Upgrading. [online] Available at: http://www.ladyada.net/make/xbee/configure.html [Accessed 18 Nov. 2014].
sparkfun, (2014). Serial Terminal Basics. [online] Available at: https://learn.sparkfun.com/tutorials/terminal-basics/all [Accessed 18 Nov. 2014].

Friday, November 14, 2014

First Technical Tutorial of the Final Sem

Post 32

Tutor(s) present: Yee Siang

Happiness level: -5

Yes, this is the first time my happiness level went below 0. Not that seeing him after the two month holiday was bad at all, it was more on how embarrassed I was with the little progress I had for the technical parts over that period.
Spent the whole time trouble shooting stuff I managed to do at home on my desktop. One thing I did though, I tried out the wifi router,

Problem 1:
I didn't record my success and what I did when I got the Unity and Arduino linked at the time, (the post which had a youtube of me waving around the working accelerometer)
I didn't even record how the wiring map looked like. I brought the try out files with ghoul files with weird namings like 'blah, tryout, try2' so I did not know which file was the exact one which worked.
So here it is:


Problem 2:
I did not try out the Xbee wifi module at all and discovered that XCTU was more complicated to use than I thought it was. There;s this new software called CoolTerm which I found online on the Arduino site which could help with the wifi on my xbee.


Tuesday, November 11, 2014

Back to School.

Post 31

Tutor(s) present: Jazmi Jamal

So here starts the first tutorial of my final semester before I plunge headfirst into land of professional working adulthood and OT's. I have made several alterations on the output of my FYP, one drastic one would be the output.

Won't be using a holobox anymore, instead I would be using a projector screen to project map the audiences beside the main screen and the main screen onto a blank wall.

My initial idea was, that I wanted o place 2 monitors at both sides of the screen for instructions and visual aids.  Like so.


BUT, if I had use the two monitors, I'd had to handle 4 monitors including the projected screen, my laptop and the two monitors along with all the extra CPU's and what not. So instead of lugging all these monitors around, using one projector to project the 3 panels would be easier.


I updated him with my progress over the holidays, the changes I made and such.


*Important actions
- Take note of the distance and projector placements
- The song isn't 'hyped' enough.
- Produce the mock up by next week.
- Test out the wifi connection

Somehow every time I think about the FYP I'd get all jittery and wouldn't know where to start. Well at least I'm making things simpler and cleaner, which also requires less effort to produce, so I'm less worried now.

Happiness Level: 6 

(Happy that I could compromise some things.
Instead of 'compromising on the idea and quality' like most people would think compromise meant, these compromises actually help the project)


Wednesday, October 22, 2014

Music editing

Post 30

Alright so after an entire month of holiday-ing I have decided to get back to work on the Woo Band. I edited the music and kind of pictured the entire flow with the sound effects and everything.


I created a mock up animation just to put on youtube. Obviously it will resemble nothing of this (as in the art style). It's kind of like a story board. At which point of the music when the graphics will be more aggressive and what not. So here's my little experiment with SUMMERTIME SADNESS:

I have edited 2 mixes so that people wouldn't be bored with just one music.
I have another one called ARE YOU READY.
Good progress I must say. 
HAPPINESS LEVEL: 8

Saturday, September 20, 2014

TESTING ARDUINO + RGB BULBS

Post 29

OH GOLLY IT WORKS! I SUCCESSFULLY CONNECTED ARDUINO TO UNITY. LIKE YEAYS.

And my RGB works!
Turns out I couldn't use any other FTDI other than the special FTDI FOR Lilypad.


This is me testing out the accelerometer in Arduino.


Here's a video of me waving it around with unity at the background.


I had an error about an extra unused class but it was just a minor problem. They didn't want me to waste the declaration.

I'm overjoyed. One step closer!

ALL THANKS TO THESE TUTORIALS:

I'm going to add a Happiness level graph later on. I thought I wanted it to be Stress Level, but..it's a little bit discouraging for my tastes.

Happines level : 10


References

LilyPad Arduino, (2013). LilyPad Accelerometer. [online] Available at: http://lilypadarduino.org/?p=384 [Accessed 20 Sep. 2014].
Mengsk, C. (2010). Unity3d + Arduino (Read serial in Unity3d) - Arduino Forum. [online] Forum Arduino. Available at: http://forum.arduino.cc/index.php/topic,40001.0.html [Accessed 20 Sep. 2014].
Stackoverflow, (2014). Weird warning : "is assigned but its value is never used". [online] Available at: http://stackoverflow.com/questions/6330491/weird-warning-is-assigned-but-its-value-is-never-used [Accessed 20 Sep. 2014].

Sunday, September 14, 2014

Misery & Linking Arduino to Unity

Post 28

I tried and tried again with my boards but it just couldn't connect.

I keep getting the same errors I got in my Aug 27 post.

Turns out I had to buy a SPECIAL FTDI Breakout board and the one I got from China is not compatible.

So, I have to get a new one. From Singapore.


I'm going to have to use my Adafruit flora to test this out while waiting for my usb chip, the tutorial to link unity and Arduino looks pretty simple.

My adafruit Flora works swimmingly and I got the response I needed. Step 1 complete.


I keep getting errors for the UNITY. Will look more into this soon. I can't seem to find the problem, I followed the tutorial word by word.


I'm going to start on editing the music tomorrow.


Happiness Level : 2

Sunday, September 7, 2014

Motion Graphic Tutorials

Post 27

These are a few examples and tutorials I watched today. I needed a proper milestone so I did this today and it's level of difficulty seems pretty okay.

http://www.videocopilot.net/tutorial/the_grid/

http://www.videocopilot.net/tutorial/3d_replicator/

http://www.videocopilot.net/tutorial/shockwaves/

http://www.videocopilot.net/tutorial/advanced_spin_fx/


Happiness Level : 5 (Neutral)

Friday, August 29, 2014

PITCH Presentation

Post 26

A little update, today is the first day of my Sem break!
I gave a talk for EMM about Wearable tech inspired from PPM's final year project:


I will be starting my final semester in November and soon, graduation!

So I presented my PITCH on Friday, 29 August.

I presented my slides Ms. Sweii, Din Tan, Klek, Yee Siang and Yi Weii.

Feedback and questions I got were and I did a little research to finally answer those questions and feedback:

Sweii: You didn't mention about how the number of participants effects the whole experience and the display?

I forgot to mention this in the presentation as well.
Two players, more visuals. 1 player active only, less visuals. No players active, totally weak visuals. Des it.

Klek: What not just do crowd motion tracking instead of making them wear something so brittle?

Honestly, I didn't know why I froze and went blank on the main reasons why I actually chose wearable tech.

The thing is that I didn't even present about how I wanted to replicate lighters, rave rings and phone lights people use during concerts. You see those little white dots in the crowd? Those are cellphones. I want to replace those pretty dots of lights with my LED from my WOO Band, which would be prettier.


I didn't mention about how the gloves would give an LED feedback once they interacted by fist-pumping.
You can't really achieve that with motion tracking the crowd pixels.

As for it being brittle, I'm trying to find a way to make it sturdy and comfortable at the same time.

1. It will have to be water resistant (as raves are often conducted outdoors and are prone to rain and/or if they were foam parties)
2. It has to be flexible and PVC will be totally out of the question because sweating through it is really uncomfortable. Cotton as well, it takes a long time to dry.


Happiness Level : 7

Wednesday, August 27, 2014

Starting with the Arduino

Post 25


Alright looks like I'm facing the same problem like I've had since Livetags.

I CAN'T ARDUINO ON MY WINDOWS 8.1 LAPTOP.

Apparently the my OS could not recognize the drivers. I'd probably end up using my old desktop to code the Arduinos like last time.

But, the thing is, I need my laptop because it's portable.

Below is the video of what I'm experiencing exactly. Except that I update the drivers from the windows folder. But it keeps saying is already updated with the best drivers. My COMPORT is still not lilypad.

The sketch and tutorial for the RGB LED is Here.

I get this error after uploading my sketch: avrdude stk500_getsync() not in sync resp=0x00

Researched online and it's probably a driver problem.


So this is what I did today.

I hooked up my arduino and it could upload the Basic Blink Sketch. I doesn't loop forever though.


So fix the drivers, I tried installing the FTDI drivers from here but it still wouldn't work.

And this is only the first day.

Happiness Level : 4

References

Buechley, L. (2014). programming the LilyPad Arduino: color (RGB LEDs). [online] Web Media MIT edu. Available at: http://web.media.mit.edu/~leah/LilyPad/06_rgb.html [Accessed 27 Aug. 2014].
Ftdichip, (2014). Virtual COM Port Drivers. [online] Available at: http://www.ftdichip.com/Drivers/VCP.htm [Accessed 27 Aug. 2014].
LilyPad Arduino, (2014). Lesson 2: Light (LEDs). [online] Available at: http://lilypadarduino.org/?page_id=212 [Accessed 27 Aug. 2014].
Van Vlymen, B. (2013). problem with serial port Arduino uno on Window 8.1. [online] YouTube. Available at: http://www.youtube.com/watch?v=uZpyPgk5NmU [Accessed 27 Aug. 2014].

Monday, August 25, 2014

Some Updates

Post 24

Honestly, I haven't been doing much for this subject since there were so many other demands and submissions from other subjects.

Anyway, this will be the benchmark for my motion graphics. It's EDM too so you will get a very clear idea on the direction of Graphics I'm going to.


PLAYLIST Here's the whole playlist of all the edm lyric videos.

I'm also downloading XCTU and should start the coding soon. Here's the link to the PREZI of my PITCH.

It's updated LIVE, so you could creepily observe my every move and every edit.

http://prezi.com/eg76l5ilkon2/woo-band/
I have embed it here. You can play it here as well.


I did not design the polygon graphics, it's one of the latest templates Prezi uploaded. I figured I could use it because it is sooo beautiful and it kind of symbolizes my need for progress to success. I'm really just crapping here, I just really like the colors and the graphics.


I also bought the wireless router today at RM80 at Pyramid and had no problem shopping around for it with the Lawyat buying guide that Yee Siang gave to me. It is also similar to Yaw's.

Happiness Level : 5 (Neutral)

References

prezi.com, (2014). Prezi - Presentation Software. [online] Available at: http://prezi.com [Accessed 25 Aug. 2014].

Youtube.com, (2014). EDM Lyric Videos - YouTube. [online] Available at: http://www.youtube.com/playlist?list=PL8aXabcnTljy22HK0mrtHpxBjZbdBqhZz [Accessed 25 Aug. 2014].
VEVO, Z. (2014). Zedd - Find You - [Lyric Video] ft. Matthew Koma & Miriam Bryant. [online] YouTube. Available at: http://www.youtube.com/watch?v=2vFLW-idOxk [Accessed 25 Aug. 2014].

Tuesday, August 19, 2014

Brainstorming period

Post. 23

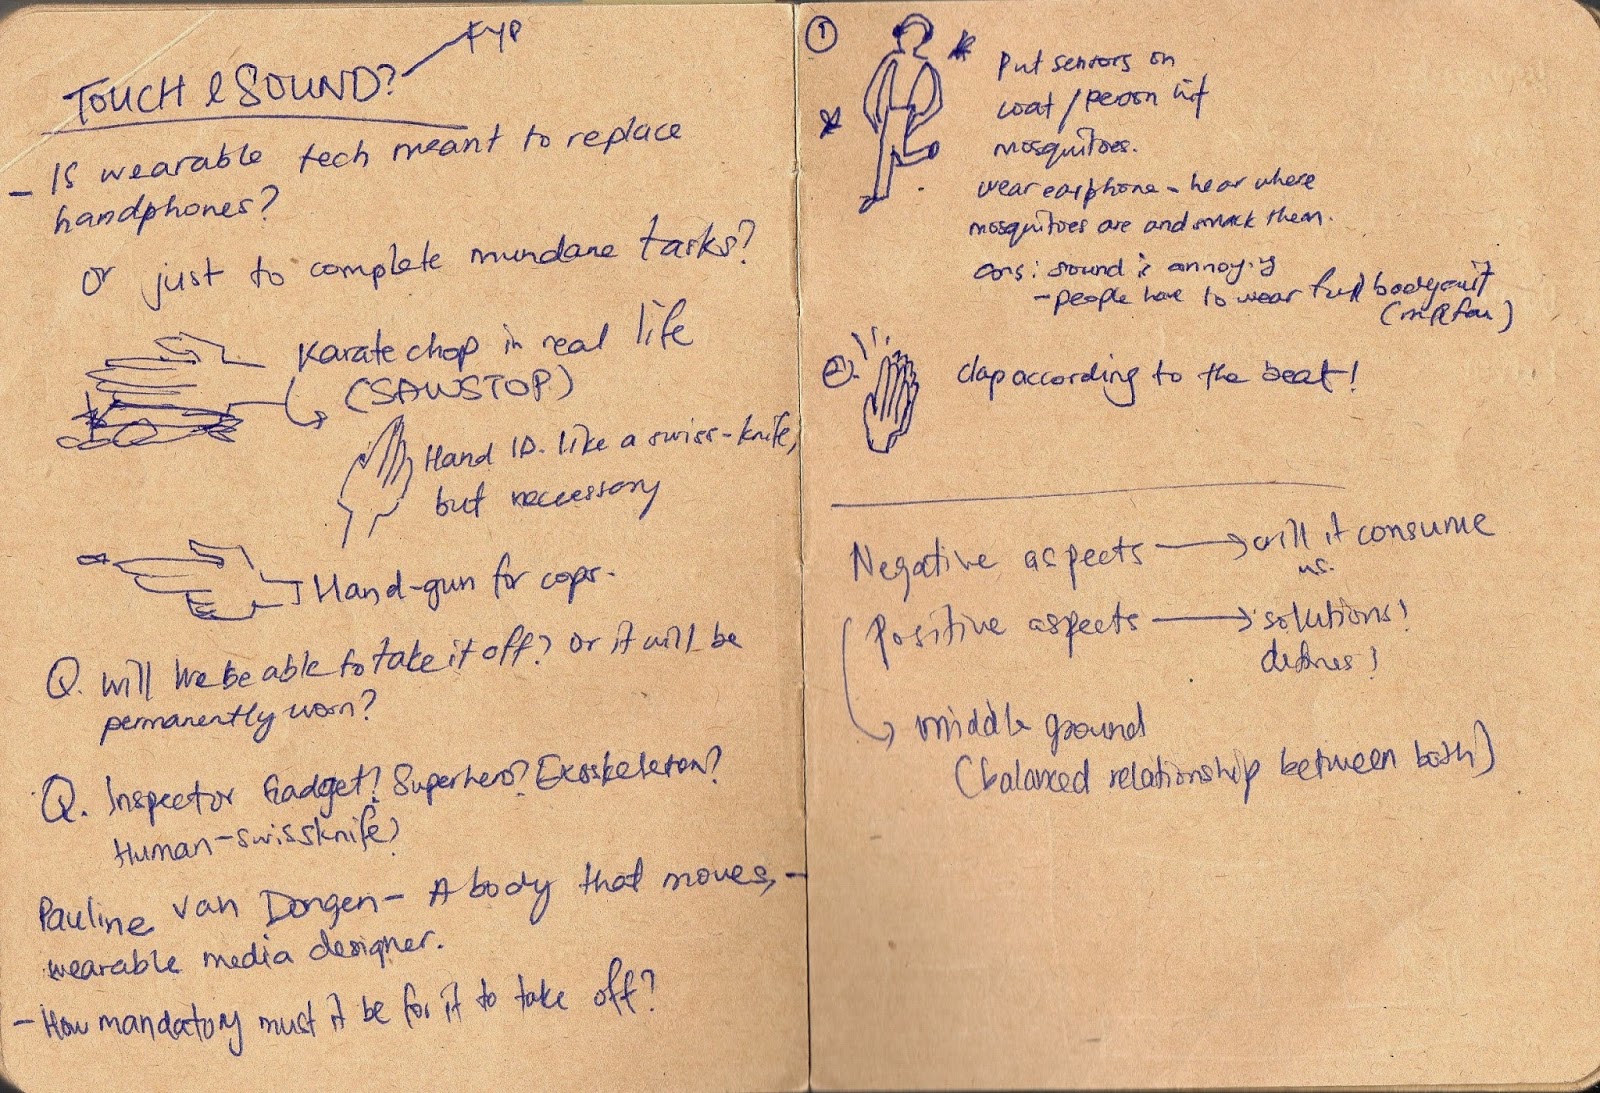
I have just made it a point to scan all my brainstorming sketches. As you can see, my mind can get pretty wild.


Happiness Level : 5 (Neutral)